eMaRC Plus Version 9.0 with NAACCR 220
Centers for Disease Control and Prevention National Center for Chronic Disease Prevention and Health Promotion Division of Cancer Prevention and Control National Program of Cancer Registries Registry Plus Software for Cancer Registries
eMaRC Plus V9.0 Updater Tool
The eMaRC Plus Updater is used to upgrade existing eMaRC Plus to the most recent version. In the most cases, the upgrade involves applying changes to the application, database, and exporting user specific customization prior to upgrade (if applicable). Tasks can be categorized into three major groups:
(1) Upgrading eMaRC Plus Application
(2) Upgrading eMaRC Plus Database Schema/Lookup Table
(3) Converting Data to NAACCR v22.0 Format from either NAACCR V180 or V210
(4) Conversion Issues/Reprocessing (if applicable)
(5) Restoring user specific customizations (if applicable)
This tool allows users to upgrade the application and database. During the upgrade process, the guided steps will keep you on track by updating in the proper sequence.
It is highly recommended that you use the eMaRC Plus Updater Tool. We also recommend IT personnel to perform the eMaRC Plus upgrade Task. However, this tool can be used by anyone with limited technical knowledge.
In an ideal situation, an Application Administrator (Administrator) should handle the Application upgrade, and a SQL Server Database Administrator (DBA) should handle database changes associated with the upgrade. This tool can be still used by each Administrator individually and independently. Although it is recommended to upgrade eMaRC Plus Application first and then its Database, it really doesn’t matter which component gets upgraded first. You should be fine if the application is NOT used prior completing both Tasks.
How to upgrade eMaRC Plus V7.X with NAACCR 21.0
The updater tool upgrades both a) eMaRC Plus application and b) eMaRC Plus database to bring eMaRC Plus V7.x to V8.0.x with NAACCR 21.0.
|
Critical Note eMaRC Plus may have been installed using one of the following approaches
|
|
|
|
Scenario
One (Fat Client approach): Installed eMaRC Plus on
individual computer (on each user’s computer), but all applications are
connected to one centralized SQL Server Database.
|
|
Scenario Two (Hosted Application approach): Installed or hosted single copy of eMaRC Plus in Windows Server, and it is connected to centralized SQL Server Database.
The User could be accessing a computer where both the application and a SQL server may be installed or could be using a Local DB instead of centralized SQL Server Database.
For these scenarios, run all Updater Steps only once. |
|

What do I need to upgrade?
1. For Application: You must have “Full Control” privileges on the folder where eMaRC Plus is installed (e.g., c:\eMaRCPlus) or you are the administrator for your computer.
2. For Database: You must have DBA (or Database Owner (DBO)) access to the eMaRC Plus database.
It is strongly advised that you perform a full back up of the eMaRC Plus database before running the Updater.
Launching eMaRC Plus Updater
1. Please read the Critical Note provided above.
2. Close eMaRC Plus if it is already open.
3. Download the eMaRC Plus 9.0 package file from the public FTP URL provided to you.
4. It is recommended that you save the downloaded zip file on your Desktop so that you can find it easily.
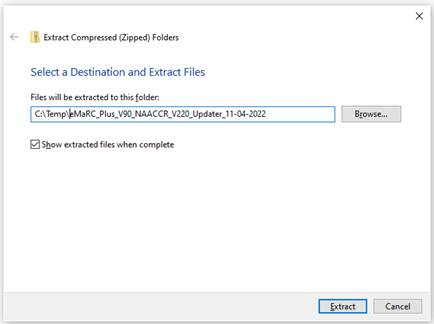
5. Right mouse click on eMaRC_Plus_V90_Updater_DD-MM-YYYY.zip and choose “Extract All”.

Choose
the suggested desktop location for the extracted files.
Make sure you remember the location path so that you can find it easily.
(Please do not run this application from a network drive and/or without
unzipping it).
6. Go into the Folder
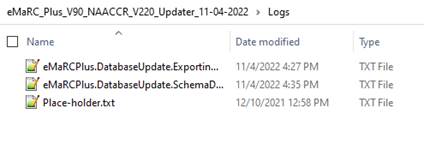
7. You will see several files/ folders:
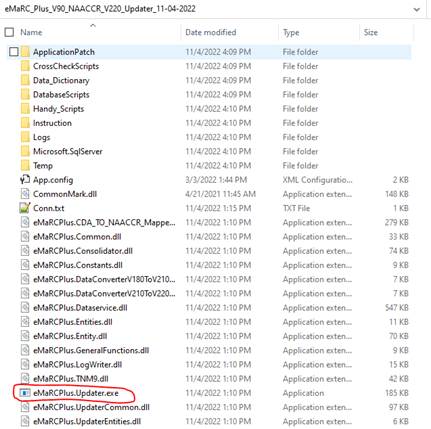
8. Double Click on
“eMaRCPlus.Updater.exe”. You will see Welcome Screen.
Choose the option that fits to your scenario and click Next
button.
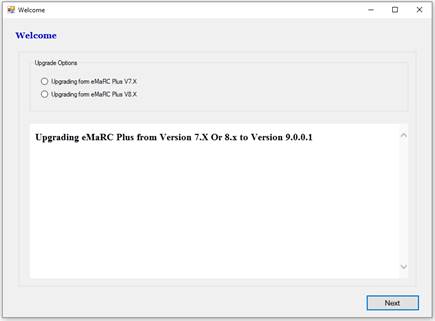
9. Click on Next Button. You will see the Step 1 Screen:
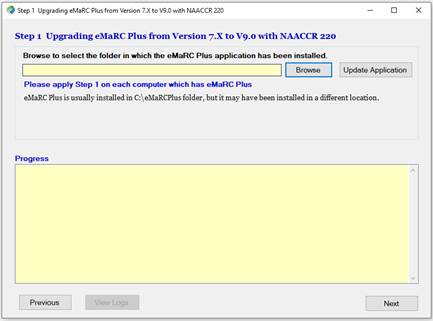
Step 1: Upgrading eMaRC Plus Application
1. You will see the screen shown below.
2. Click on “Browse” and locate where eMaRC Plus is installed. Most likely eMaRC Plus is installed in the default location, i.e., C:\eMaRCPlus, but it may be installed in any directory.
3. Now the “Update Application” button will be active.
4. Click on the “Update Application” button.
5. You will see the following prompt within a few seconds:
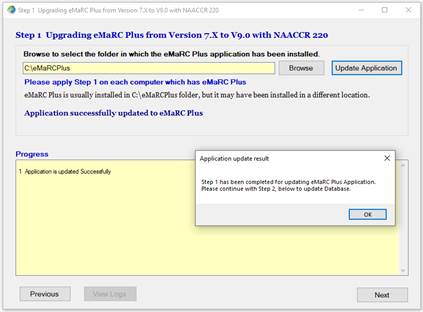
6. Click on the “OK” button.
7. Click the “Next” button
to proceed with the Database update.
The DBA should run Step 2 and the remaining steps.
These steps require at least DBO (Database Owner) privilege to apply
schema/data changes.
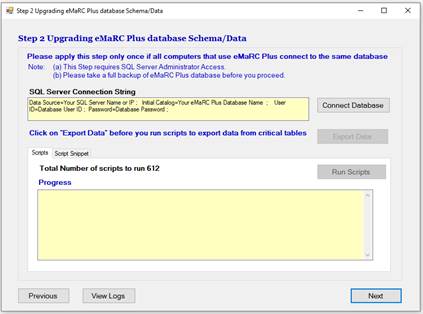
Step 2: Upgrading eMaRC Plus Database Schema/Data
|
|
Please read the instructions provided above first. Perform a full backup of the eMaRC Plus Database before proceeding. |

1. Now you need to get the database connection string from your DBA. The username/password that you are using in the connection string must have database administrative privilege to work.
A typical connection string is shown below.
Replace the highlighted text with your relevant information.
Data Source=Your SQL Server Name or IP ;
Initial Catalog=Your eMaRC Plus Database Name
; User ID=Database User ID ;
Password=Database Password ;
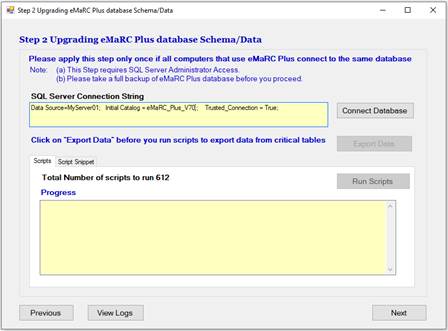
Connection
string may look like below, but it may varies depending on how SQL Server are
setup in your institution. Get help from your DBA for connection string
|
Option 1 |
Data Source=Your SQL Server Name or IP ;
|
|
Option 2 |
Data Source = YourDBServerName ;
|
2. Click on
the “Connect Database” button. If the connection is good, then you will
see the following message.
Please be advised that you may not still have
administrative privileges, which is required to run scripts.
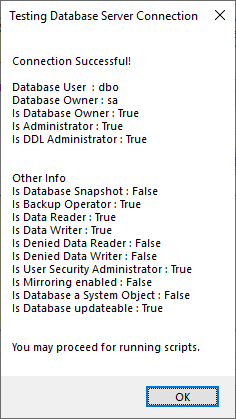
3. Now you will see that the “Export Data” button is active.
4. Click on the “Export Data” button. You will be asked to select a directory in which to place the exported file. You will need DBO or DBA access to the eMaRC Plus database to perform this export.
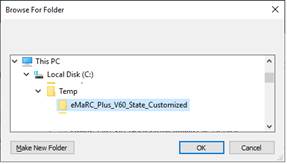
In this example, exported SQL Script is being placed under C:\Temp\eMaRC_Plus_V60_State_Customized folder.
|
|
This “Export Data” feature allows you to export database tables as SQL Scripts from your eMaRC Plus Database. Only those tables that are getting overwritten and could have your customizations will be exported.
Please keep these files in safe place. Please provide these files to CDC and ask for help to put back your customizations.
Please DO NOT run exported SQL files after you complete the upgrade without communicating with CDC. |

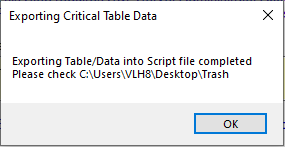
5. You will notice progress
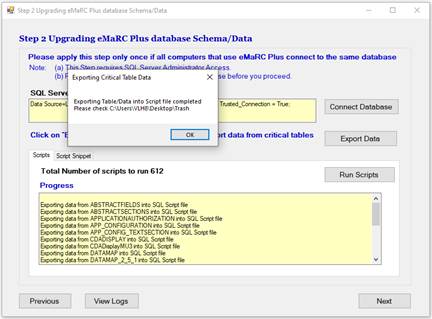
6. You will also see the following message box indicating where the exported file is saved. Click on OK.
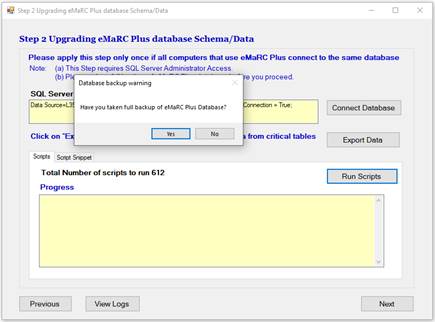
7. Now you will see the “Run Scripts” button is active. Click on the “Run Scripts” button.
8. You will be asked whether you have performed a full backup of the eMaRC Plus database or not. Please make sure you perform a full database backup.
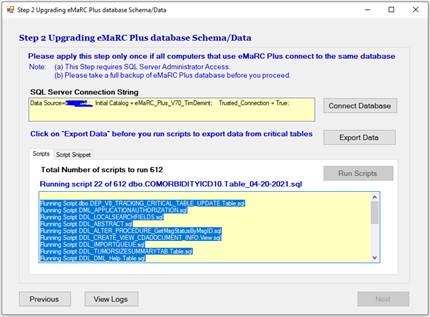
9. You will notice progress with information indicating which scripts are being generated. See the area in the yellow box in the picture below:
10. You will receive the following acknowledgement saying that you must review the log file to check if any errors occurred during execution of the database upgrade. Please review “Updater.Database_Upgrade_Log.txt”.
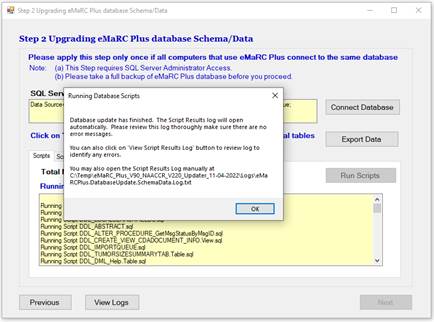
11. Click on OK.
12. Please check the progress information area (yellow color area at the bottom) to check for obvious issues and scroll all the way to the end to check for any issue you might have run into during script-running (see area in red box on the image below).
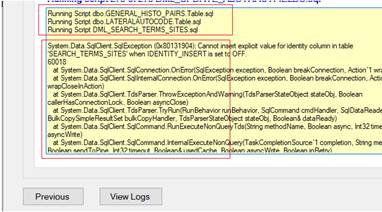
In the above image, the first Red Boxed area shows scripts ran successfully
The second Red Boxed area shows the script
did not run correctly. The name of script file is “DML_TERMS_SITES.sql”
If you see any error messages, please contact CDC for assistance and send CDC
all log files that you find after clicking the “View Logs” button.
13. Click on Next for “Step 3 Converting Data into NAACCR 220 Format” window
Step 3: Converting Data into NAACCR 220 Format
There are two modules in eMaRC Plus a) Pathology Modules and b) Physician Module.
Each module produces Abstracts data. These Abstracts Data need to be converted to current standard provided by NAACCR Version.

This window allows you to convert ePath module’s Abstracts data and Physician Module’s Abstracts Data. These steps can be run on multiple computer to process conversion in parallel.
1. Click on
Connect Database to make sure you are still connected to your eMaRC Plus
database.
![]()
2. You will
be prompted with connection privilege info as below

3. Click on
Abstracts Data Info button to get how much data you must convert.
![]()
4. You will
see information as below.
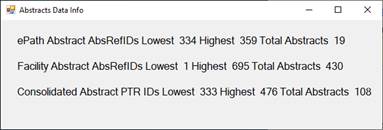
5. Now use this information to start converting data. Enter how much data you want to convert at once. Since there are only 19 records in this example, I am converting all of these in one shot.
![]()
But if you have thousands of records, you may want to run these on different computers to finish the task faster.
|
Computer 1 |
Converting records from 1 to 50,000
|
|
Computer 2 |
Converting records from 50,001 to 100,000
|
6. When you
click on “Convert ePath Abstracts”, you will be asked if you have taken a
backup or not.
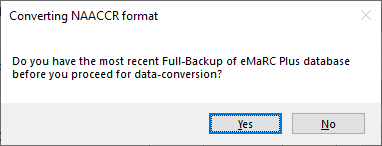
7. If your response is “Yes”, then you will start noticing the conversion process.
You will see that all conversion buttons are disabled until it completes the conversion task.
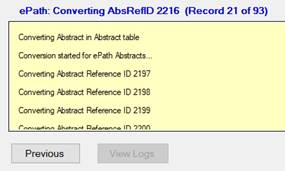
Conversion process may take several hours if you have lots of data.
8. Once conversion is complete, it will open a folder containing conversion lots.
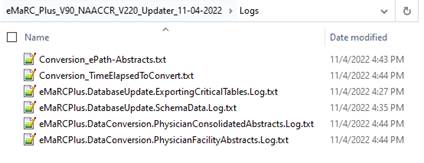
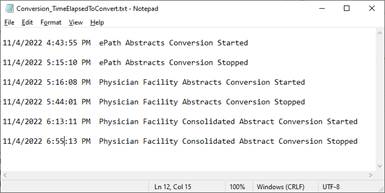
9. If you
open Conversion_Elapsed_Time.txt, you will notice when conversion started and
when it was ended. It will give you idea on how long it took to covert the
data.
10. Repeat steps 3 through 9 for Physician module data. The Physician module has two different areas to convert a) Facility Abstracts and b) Consolidated Abstracts. The converting process is similar to ePath.

Step 4: Note
This window is reminding you that an eMaRC Plus user may have customized their settings, such as the Abstract Display Fields. If that is the case, then you will need to work with CDC to transfer the settings that you had prior upgrading to the new version of eMaRC Plus.
You will need to provide an exported script from Step 2 to CDC to extract customization. Please DO NOT run the exported script, because it could create issues with the new updated version. Contact CDC for support.
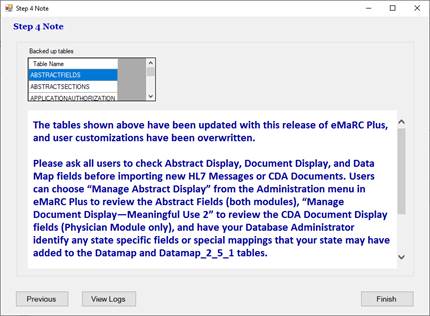
The tables shown
above have been updated with this release of eMaRC Plus, and user
customizations have been overwritten.
Please ask all users to check Abstract Display, Document Display, and Data Map
fields before importing new HL7 Messages or CDA Documents. Users can choose
“Manage Abstract Display” from the Administration menu in eMaRC Plus to review
the Abstract Fields (applies to both modules). “Manage Document
Display—Meaningful Use 2” to review the CDA Document Display fields (Physician
Module only) and have your Database Administrator identify any state specific
fields or special mappings that your state may have added to the Datamap and
Datamap_2_5_1 table.
If users find that previous customizations are missing, please contact CDC so we can work with you to re-implement your customizations. As part of this process, CDC will need to review those scripts that were exported in Step 2.