eMaRC Plus Version 9.0 with NAACCR 220
Centers for Disease Control and Prevention National Center for Chronic Disease Prevention and Health Promotion Division of Cancer Prevention and Control National Program of Cancer Registries Registry Plus Software for Cancer Registries
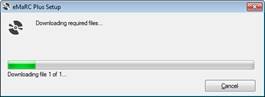
eMaRC Plus installation requires the following Microsoft components as prerequisites. If any of these components are missing, the installation mechanism will downloaded automatically from the Microsoft Server. Each of these missing component will be installed prior to installing eMaRC Plus version 9.0
During this process, you may be required to restart your computer several times. You may also need to double click on Setup.exe again to resume for the remaining tasks.
Prerequisite Components
1. Microsoft .NET Framework 4.52 or higher
2. SQL Server 2016 Express LocalDB
3. Windows Installer 4.5
There are a few different ways you can install eMaRC Plus
1. Installing eMaRC Plus locally
- Solution for low budget scenario
- Application and Database on local computer
-
If you fail to
backup database periodically, it has high risk of losing data when computer
crashes
2. Installing eMaRC Plus using fat client approach
-
Installs multiple
copies of eMaRC Plus on individual machines (Client), but all eMaRC Plus (clients)
copies pointing to the same database on a centralized, and managed database
server
3. Installing eMaRC Plus under hosted environment
- Highly recommended approach
- Technology such as Remote RD over Windows Server, Citrix Server over Windows Server, VMWare etc.
-
Database Server/Database
can be on the same server or dedicated SQL Server
A. Installing eMaRC Plus Locally
1. Unzip the downloaded eMaRC_Plus_V90_NAACCR220_MM-DD-2022.zip file. It is recommended that you put the unzipped file in your Desktop folder or C:\Temp\eMaRCPlus_Setup
2. You will see the following two files:

3. Double click on Setup.exe
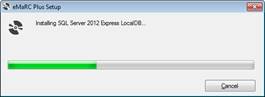
4. If SQL Server 2016 Express LocalDB is not installed, you will see the following window:
Image will similar to 2012 for SQL Server 2016
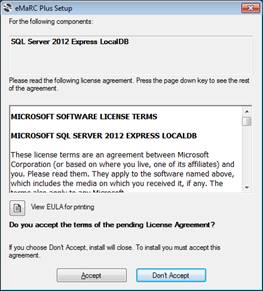
5. Click on “Accept”
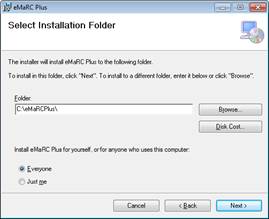
6. You will see the following screen:

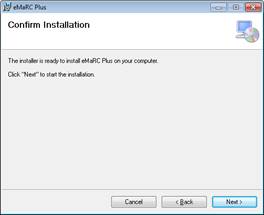
7. Please click on Next
8. Please click on Next
9. Please click on Next
10. Please click on Next
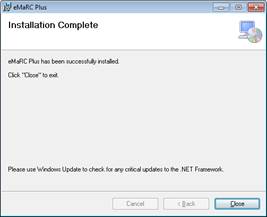
11. Please click on Close
12. You will notice the eMaRC Plus icon on your desktop as well as under Registry Plus on your Windows Start menu>>All programs.
13.
Double Click on the
eMaRC Plus icon to start eMaRC Plus.
B. Installing eMaRC Plus using fat client approach (NOT recommended)
In this approach, you would need to install eMaRC Plus on each machine locally. Just follow the same exact steps which are stated under “Installing eMaRC Plus locally”. You would need to install eMaRC Plus on each individual machine that you want to have eMaRC Plus.
1. Please follow all steps associated with “Installing eMaRC Plus locally”
i.
Repeat this
process for each individual computer you want to have eMaRC Plus
2. Now you will need to work have a Database Administrator (DBA) setup the Database for eMaRC Plus.
i. Please provide the following files to your SQL Server Database Server Administrator:
1. eMaRC_Plus.mdf
2.
eMaRC_Plus_log.ldf
These files are located in C:\eMaRCPlus\Database
3.
Your DBA will use
the files above to create the database. S/he will provide your database
connection information.
Server Name:
DATABASE:
UID (Database User ID):
PWD (Password)
4.
Use the above
connection information to build the SQL Server Connection string as shown
below. Replaced the highlighted text with the appropriate values.
SERVER=Server IP or Name; DATABASE=eMaRCPlus database name; UID=database user id; PWD=database password; MultipleActiveResultSets=true;
5. Now open MyConfig.cfg file in notepad or any text editor. This file is located in C:\eMaRCPlus.
6.
Locate the
following text in that file:
<OptionValue>
Server=(LocalDb)\MSSQLLocalDB;
Integrated Security=true;
AttachDbFileName=C:\eMaRCPlus\Database\eMaRC_Plus.mdf;
MultipleActiveResultSets=true;
</OptionValue>
7. Now replace the highlighted text above with the connection string you built.
8. Save and close MyConfig.cfg.
9. Now open eMaRC Plus by double clicking on its icon on the desktop.
10. Log in by using the default user id and password
i. Change default password
ii. Add more users if necessary
iii. Please refer to documentation located in C:\eMaRCPlus\Help more details
11. Now Copy MyConfig.cfg from this computer to all the other individual computers where you installed eMaRC Plus. Copy it in the same location (e.g., C:\eMaRCPlus).
C. Installing eMaRC Plus under hosted environment
This approach is highly recommend. This cuts down support
time when needed. This approach requires the following environment. Please work
with Windows Server, Citrix server, or VMWare administrator to install this process.
We highly recommand the latest Windows Server for better security and support.
a) Windows Server 2016 or newer
b) Setting up Remote RD or Citrix Client
Install the process in nutshell:
1. Please follow all of the steps associated with “Installing eMaRC Plus locally”
-
Repeat this
process for each individual computer you want to have eMaRC Plus
2. Now you will need to have a DBA set up the Database for eMaRC Plus.
- Please provide the following files to your SQL Server Database Server Administrator:
1. eMaRC_Plus.mdf
2. eMaRC_Plus_log.ldf
- These files are located in C:\eMaRCPlus\Database
3.
Your DBAwill use
the files above to create the database. S/he will provide your database
connection information.
Server Name:
DATABASE:
UID (Database User ID):
PWD (Password)
4.
Use the above
connection information to build the SQL Server Connection string as below.
Replace the highlighted text with the appropriate values.
SERVER=Server IP or Name; DATABASE=eMaRCPlus database name; UID=database user id; PWD=database password; MultipleActiveResultSets=true;
5. Now open MyConfig.cfg file in notepad or any text editor. This file is located in C:\eMaRCPlus.
6.
Locate the
following text in that file:
<OptionValue>
Server=(LocalDb)\MSSQLLocalDB;
Integrated Security=true;
AttachDbFileName=C:\eMaRCPlus\Database\eMaRC_Plus.mdf;
MultipleActiveResultSets=true;
</OptionValue>
7. Now replace the above highlighted text with the connection string you built.
8. Save and close MyConfig.cfg.
9. Now open eMaRC Plus by double clicking on the icon on desktop
10. Log in by using the default user id and password
1. Change default password
2. Add more users if necessary
3. Please refer to documentation located in C:\eMaRCPlus\Help more details
11. Please provide user instruction about how to connect to the hosted application.