eMaRC Plus Version 8.0 with NAACCR 210
Centers for Disease Control and Prevention National Center for Chronic Disease Prevention and Health Promotion Division of Cancer Prevention and Control National Program of Cancer Registries Registry Plus Software for Cancer Registries
How to apply Service Pack (aka Patch)?
1.
Unzip download
Zipped file
(e.g. eMaRC_Plus_V80_NAACCR_V210_ServicePack-1_06-30-2022)
2.
You will see the
following file folder structure

3.
Double click on
eMaRCPlus.Updater.exe file to lunch Patch Tool
4.
You will see the
first screen with list of enhancements /bug fixes

5. Click on Next Button
6.
You will see
application patch window as shown below.

7.
Specify the path
where you have eMaRC Plus installed. Usually it is installed in C:\eMaRCPlus by
default. It is possible that it may have installed in some other folder or
drive

8. Click on “Update Application” button
9.
In a few second
you should see the prompt below saying update complete

10.
Click on OK to
close that pop up. You will be prompted with logs. You can quick check for issue
and close this text file.

11. Click on Next, to get on Database update screen

12.
Provide
connection string and click on “Connect Database ” to check connection

13. Click on OK to close this pop info
14.
You will notice, Export Data button is not active and clickable
Click on Export Data

15.
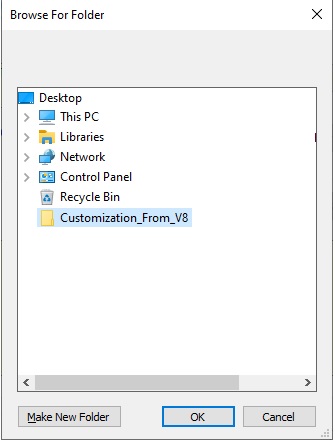
Select the folder where you want to keep data as script file
Make sure you would keep this files in safe place.
You will need this when you need to extract State specific local data items.
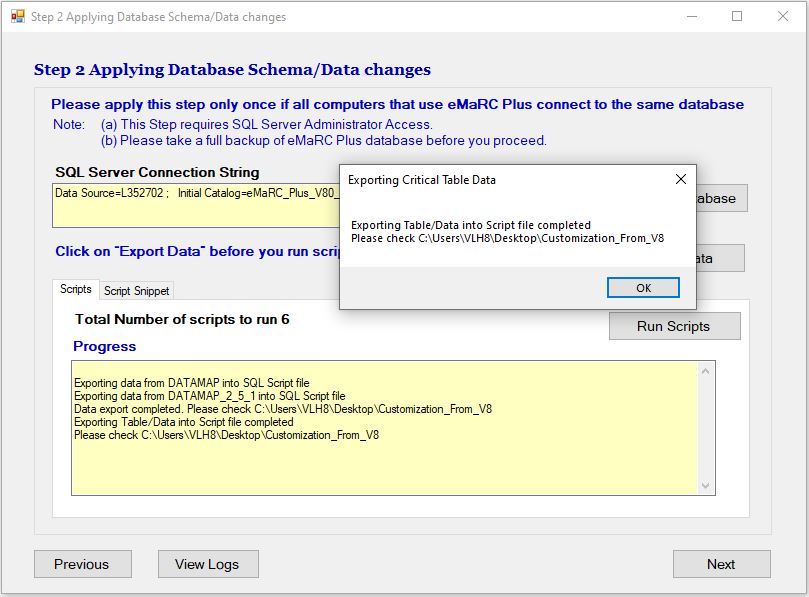
You will be prompted then Window below once export completes

16.
Now you can Click on “Run Script ” button to run script associated with database changes. You will see the following pop up

17. Click yes, if you have taken backup. If not take back up first
18.
You will see
script gets run and see the following screen

19. Read provided info on pop up window. Click on OK to close pop up
20.
You will be
prompted with log files. Go thru each log file and check for issue that you may
ran into.

21. Click on Next button
22.
You will see the
final window

23.
Click on Finish
to close updater tool